Three phases that build your first pole invert
 Save
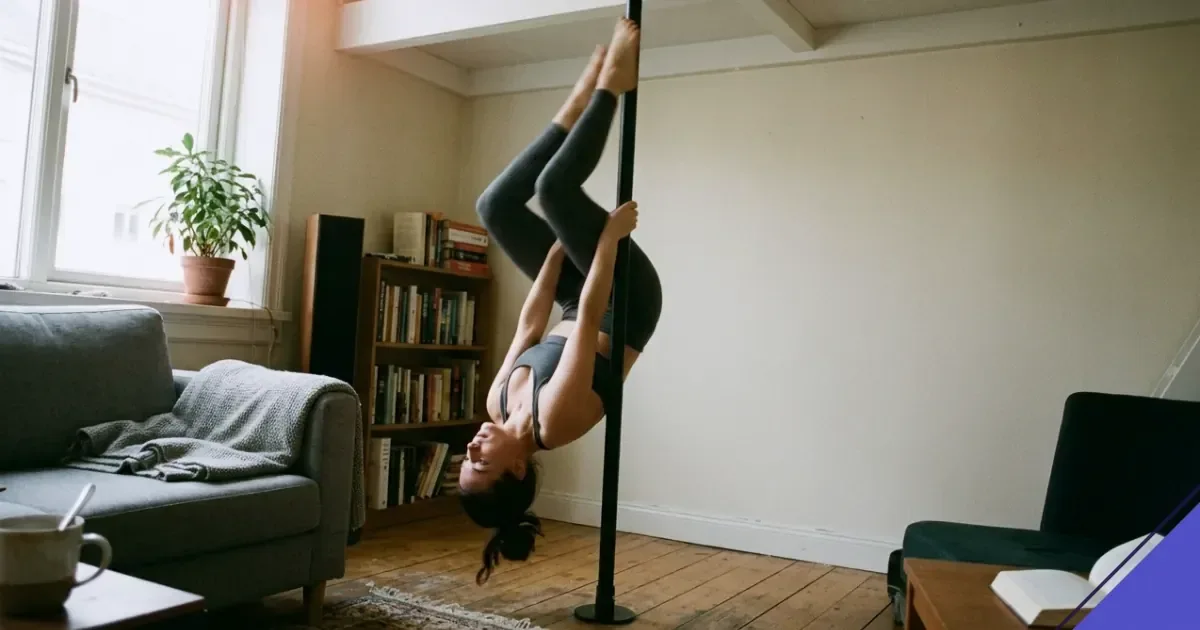
An invert lifts your hips above your head while you're gripping the pole with your hands. The movement breaks into three phases: engaging your core and upper body, lifting your legs past horizontal, then holding the inverted position. What follows walks you through each phase and the strength prerequisites most instructors check before you attempt one. Cumbria Pole Art covers pole dance fitness techniques for people training at home or in a studio.
Engagement secures your upper body before the lift
Your hands grip the pole at shoulder width or slightly wider, with your dominant hand higher. Pull your shoulder blades down and back. Engage your core as if you were bracing for impact. This contraction creates the stable platform the lift needs.
Your elbows stay bent throughout the engagement phase. A straight-arm start forces the lift to come from momentum rather than controlled muscle action. Bent arms let you pull your body closer to the pole, which shortens the lever and reduces the demand on your core.
The lift moves your centre of mass past the tipping point
Tuck your knees towards your chest while keeping your core engaged. Your hips begin to rise as your knees come up. Once your knees are at chest height, extend your legs upwards. The pole remains vertical; your body rotates around it.
The transition from tucked to extended happens in one smooth motion. Pausing mid-lift increases the load on your arms and core, which makes the rest of the movement harder. Aim for a controlled, continuous action from tuck to full inversion.
Holding the inverted position requires sustained tension
Your legs are now above your head, with your body in a straight or slightly arched line. Your hands stay where they were during engagement. Your core works to prevent your back from collapsing into the pole.
Hold the position for a breath or two before you lower. Coming down is the same movement in reverse: bend your knees, bring them to your chest, then extend your legs back to the floor. Lowering under control builds the same muscles you used to lift.
Strength prerequisites teachers check before the first attempt
Most instructors want you to hold a pole sit for at least ten seconds before trying an invert. A pole sit positions your body horizontally on the pole with bent knees, which tests whether your arms and core can support your weight in a sustained hold. If you can't maintain a pole sit, the inverted hold will be out of reach.
You also need the ability to lift your knees to chest height while hanging from a bar or the pole itself. This tests hip flexor and lower abdominal strength. If your knees don't reach your chest, the tucked phase of the invert won't happen.
A dead hang from the pole for twenty seconds shows your grip can handle the full movement. Grip gives out before core strength in many failed invert attempts. Managing grip during practice addresses what to do when your hands lose tack mid-session.
Common points where the movement breaks down
Your hips don't rise high enough if your core isn't engaged before the tuck. The lift phase depends on that pre-tension. Re-start from the engagement phase rather than trying to muscle through from a loose beginning.
Your legs swing away from the pole if your initial grip is too wide or too narrow. Shoulder-width hand placement keeps your body close enough to the pole that the lift path stays vertical. Adjust your grip width before the next attempt.
You lose the inverted position quickly if you're holding your breath. Breathing out at the top of the invert releases unnecessary tension in your upper body, which paradoxically makes the hold easier. Inhale during the tuck, exhale once your legs are extended.
How to build the strength an invert needs
Strengthen your core and upper body through movements that replicate the phases. Hanging knee raises train the tuck. Pull-ups or assisted pull-ups build the arm and back strength the engagement phase uses. Planks and hollow-body holds condition your core for the sustained tension of the inverted hold.
- Hang from the pole or a bar and lift your knees to your chest, holding for a breath before lowering them.
- Practise pole sits, increasing the hold time each session until you can maintain one for fifteen seconds.
- Work on negative pull-ups: jump to the top position of a pull-up, then lower yourself as slowly as possible.
- Add hollow-body holds to your warm-up: lie on your back, press your lower back into the floor, then lift your shoulders and legs a few inches off the ground.
Each of these movements isolates one part of the invert. Training them separately builds the strength you need without the coordination challenge of the full movement. Once you can perform each one comfortably, the invert becomes a matter of sequencing rather than raw strength.
Progressions that prepare your body for the full movement
A tuck invert keeps your knees bent throughout the lift and hold. Your legs never extend. This variation reduces the lever length, which makes the lift easier. Once you can hold a tuck invert for several breaths, the straight-leg version becomes achievable.
Assisted inverts use a resistance band looped around the pole at hip height. Step into the band before you begin the tuck. The band supports some of your weight during the lift phase, which lets you focus on the technique without the full load. Reduce the band's assistance over time as your strength improves.
Inverts on a crash mat let you practise the movement without fear of falling. The mat doesn't make the invert easier, but it removes the hesitation that can break your engagement mid-lift. Positioning shifts that reduce impact covers how to land safely when a move doesn't complete.
What changes when you invert on a spinning pole
The pole's rotation adds centrifugal force, which pulls your body away from the pole during the lift. You need a tighter grip and more engaged arms to counteract this outward pull. The lift phase happens faster because the spin accelerates the upward motion once your legs are tucked.
Holding the inverted position on a spinning pole requires more core tension than on a static pole. Your body wants to drift away from vertical as the pole turns. Keep your gaze fixed on a point in front of you rather than following the room's rotation, which helps maintain your balance. How spinning and static modes change every move compares the mechanics of both.
Steps to take this week
Test your pole sit hold time. If you can't reach ten seconds, that becomes your first goal. Add hanging knee raises to your training session, aiming for three sets of five controlled lifts. Practise dead hangs from the pole, building towards a twenty-second hold. Each of these movements addresses one part of the invert without the complexity of the full sequence.
| Progression | What it trains | When to use it |
|---|---|---|
| Tuck invert | Lift phase with shorter lever | Before attempting straight-leg version |
| Banded assist | Full movement with reduced load | When you can hold a pole sit but not lift to inverted |
| Negative invert | Lowering phase under control | After you can reach inverted position with assistance |
Download PDF: Invert readiness checklist PDF, 28 KB
Further reading
Frequently asked questions
How long does it take to learn an invert?
The time varies depending on your starting strength and how often you train. Most people need several weeks of conditioning work before attempting the full movement. Consistent practice of the prerequisite exercises shortens the timeline.
Can you invert without being able to do a pull-up?
A pull-up and an invert use similar muscle groups, but the movement patterns differ. You don't need a full pull-up to invert, though the ability to hold a bent-arm hang makes the engagement phase easier. Focus on the specific progressions rather than pull-up training.
What should I do if my legs won't lift past horizontal?
Your core or hip flexors need more conditioning. Go back to hanging knee raises and pole sits. Once you can bring your knees to chest height in a dead hang, the lift phase becomes possible. Forcing the movement before you're ready risks injury.